Quick Start
1. Set your Path
Open Path and set a simple destination for the first capture. Check the preview before continuing. The app adds the file extension when the image is saved. A good first template is:
c:\images\@GCT42. Select the body and connect
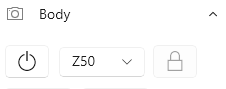
Select your camera from the picklist and then press Toggle connection. If the body does not connect, check that the camera is on, USB is connected, and no other tethering app is using it.
3. Compose in Live View
Open Live view, compose and then click on the image to autofocus. If the focus box does not move when you click, you may need to Lock the body and/or set an appropriate focus mode and/or focus area mode, all in the Body tab.
4. Capture an image with Shoot
Click on to capture one image. Wait for the capture to finish and for the file to save to the Path destination.
5. Review the image in the Image Browser
Open Browser and select the folder where the image was saved. Review your captured image, it's histogram, and metadata.
Next steps
- Use Path when you want better folder and filename templates.
- Use Connecting if the camera is not detected or will not connect.
- Use Live View to learn the preview, focus, and composition controls.
- Use Image Browser to choose review, metadata, and thumbnail behavior.